home
back
to reliability mods page
created March 2016
Your amp will work just
fine without this. Leo and his successors knew what they were
doing when they designed these amps without forced cooling. And
of course we're not trying to cool the valves (tubes) - they
need to be hot to work. But all the other works are inside a
metal box which is heated from below by the valves, and (rule of
thumb) mean time between failures is halved for every 10 deg C
rise in temperature. So why not try to blow the heat away from
under the chassis?
I was lying awake one
night when, for no reason, I thought of the unusual footswitch
design for this range of amps, which is fed with -6.2VDC from
the amp's logic circuit in order to power up the LEDs in the
footswitch. Why not use that to drive a fan? If you're not using
the 'lead' effect, and many PRII users don't, then you don't need to dismantle the amp to get
that -6.2V; you just put a 1/4" TRS (stereo) jack plug in the
'red' footswitch socket and connect to the tip.
This DC supply can
deliver more than enough current to power a small DC fan. Any
12V fan will probably be fine, and because it's only getting 6V
it will run very quietly. When I first tried this, I discovered
the fan put some interference onto the DC supply, which came out
of the speaker as amplified noise. With thanks to pdf64 on the
Fender Discussion Page for his advice, I found that adding a
220uF capacitor (220 microFarad) across the fan supply killed
the noise. Probably any similar value will do the same. Your
amp/fan combination might not need a cap at all.
Advantages...
Cheap some folks will already have all the parts they
need in their box of bits.
Automatic It
goes on and off with the amp.
Simple Experienced electronic guys can see where this is
going and won't even need to read any further. You need a stereo
1/4" jack plug, preferably right-angled; a 12VDC fan; an
electrolytic capacitor, about 220uF, 10V or higher, and a few
screws to mount the fan.
Non-invasive Depending on where you mount the fan,
you might take the upper wooden panel off the back of the amp
for a few minutes, but you don't need to go
inside the chassis.
Reversible Again depending on how you mount the fan, you
might screw some small woodscrews into the inside of the
cabinet, but you won't drill into the chassis. And if the fan
fails or goes noisy, pull the plug out of the footswitch socket
and carry on. Fix it some other time.
Disadvantage
Completely denies
you the use of
the 'lead' effect, with or without the footswitch. Due to
the alien nature of what's connected to the red pedal
socket, pulling
the volume knob for 'lead' will add a load of noise and the 'lead'
volume knob won't work. Does no damage, just
sounds terrible.
Don't Get This Wrong
The supply on the 'tip' terminal of the jack socket is MINUS
6.2VDC, so your fan's positive wire and your capacitor's
positive end MUST connect to the body or sleeve on the jack plug
- that's the chassis or ground. The negatives connect to the
'tip' terminal. Get this wrong, and there will be a small but
messy explosion.
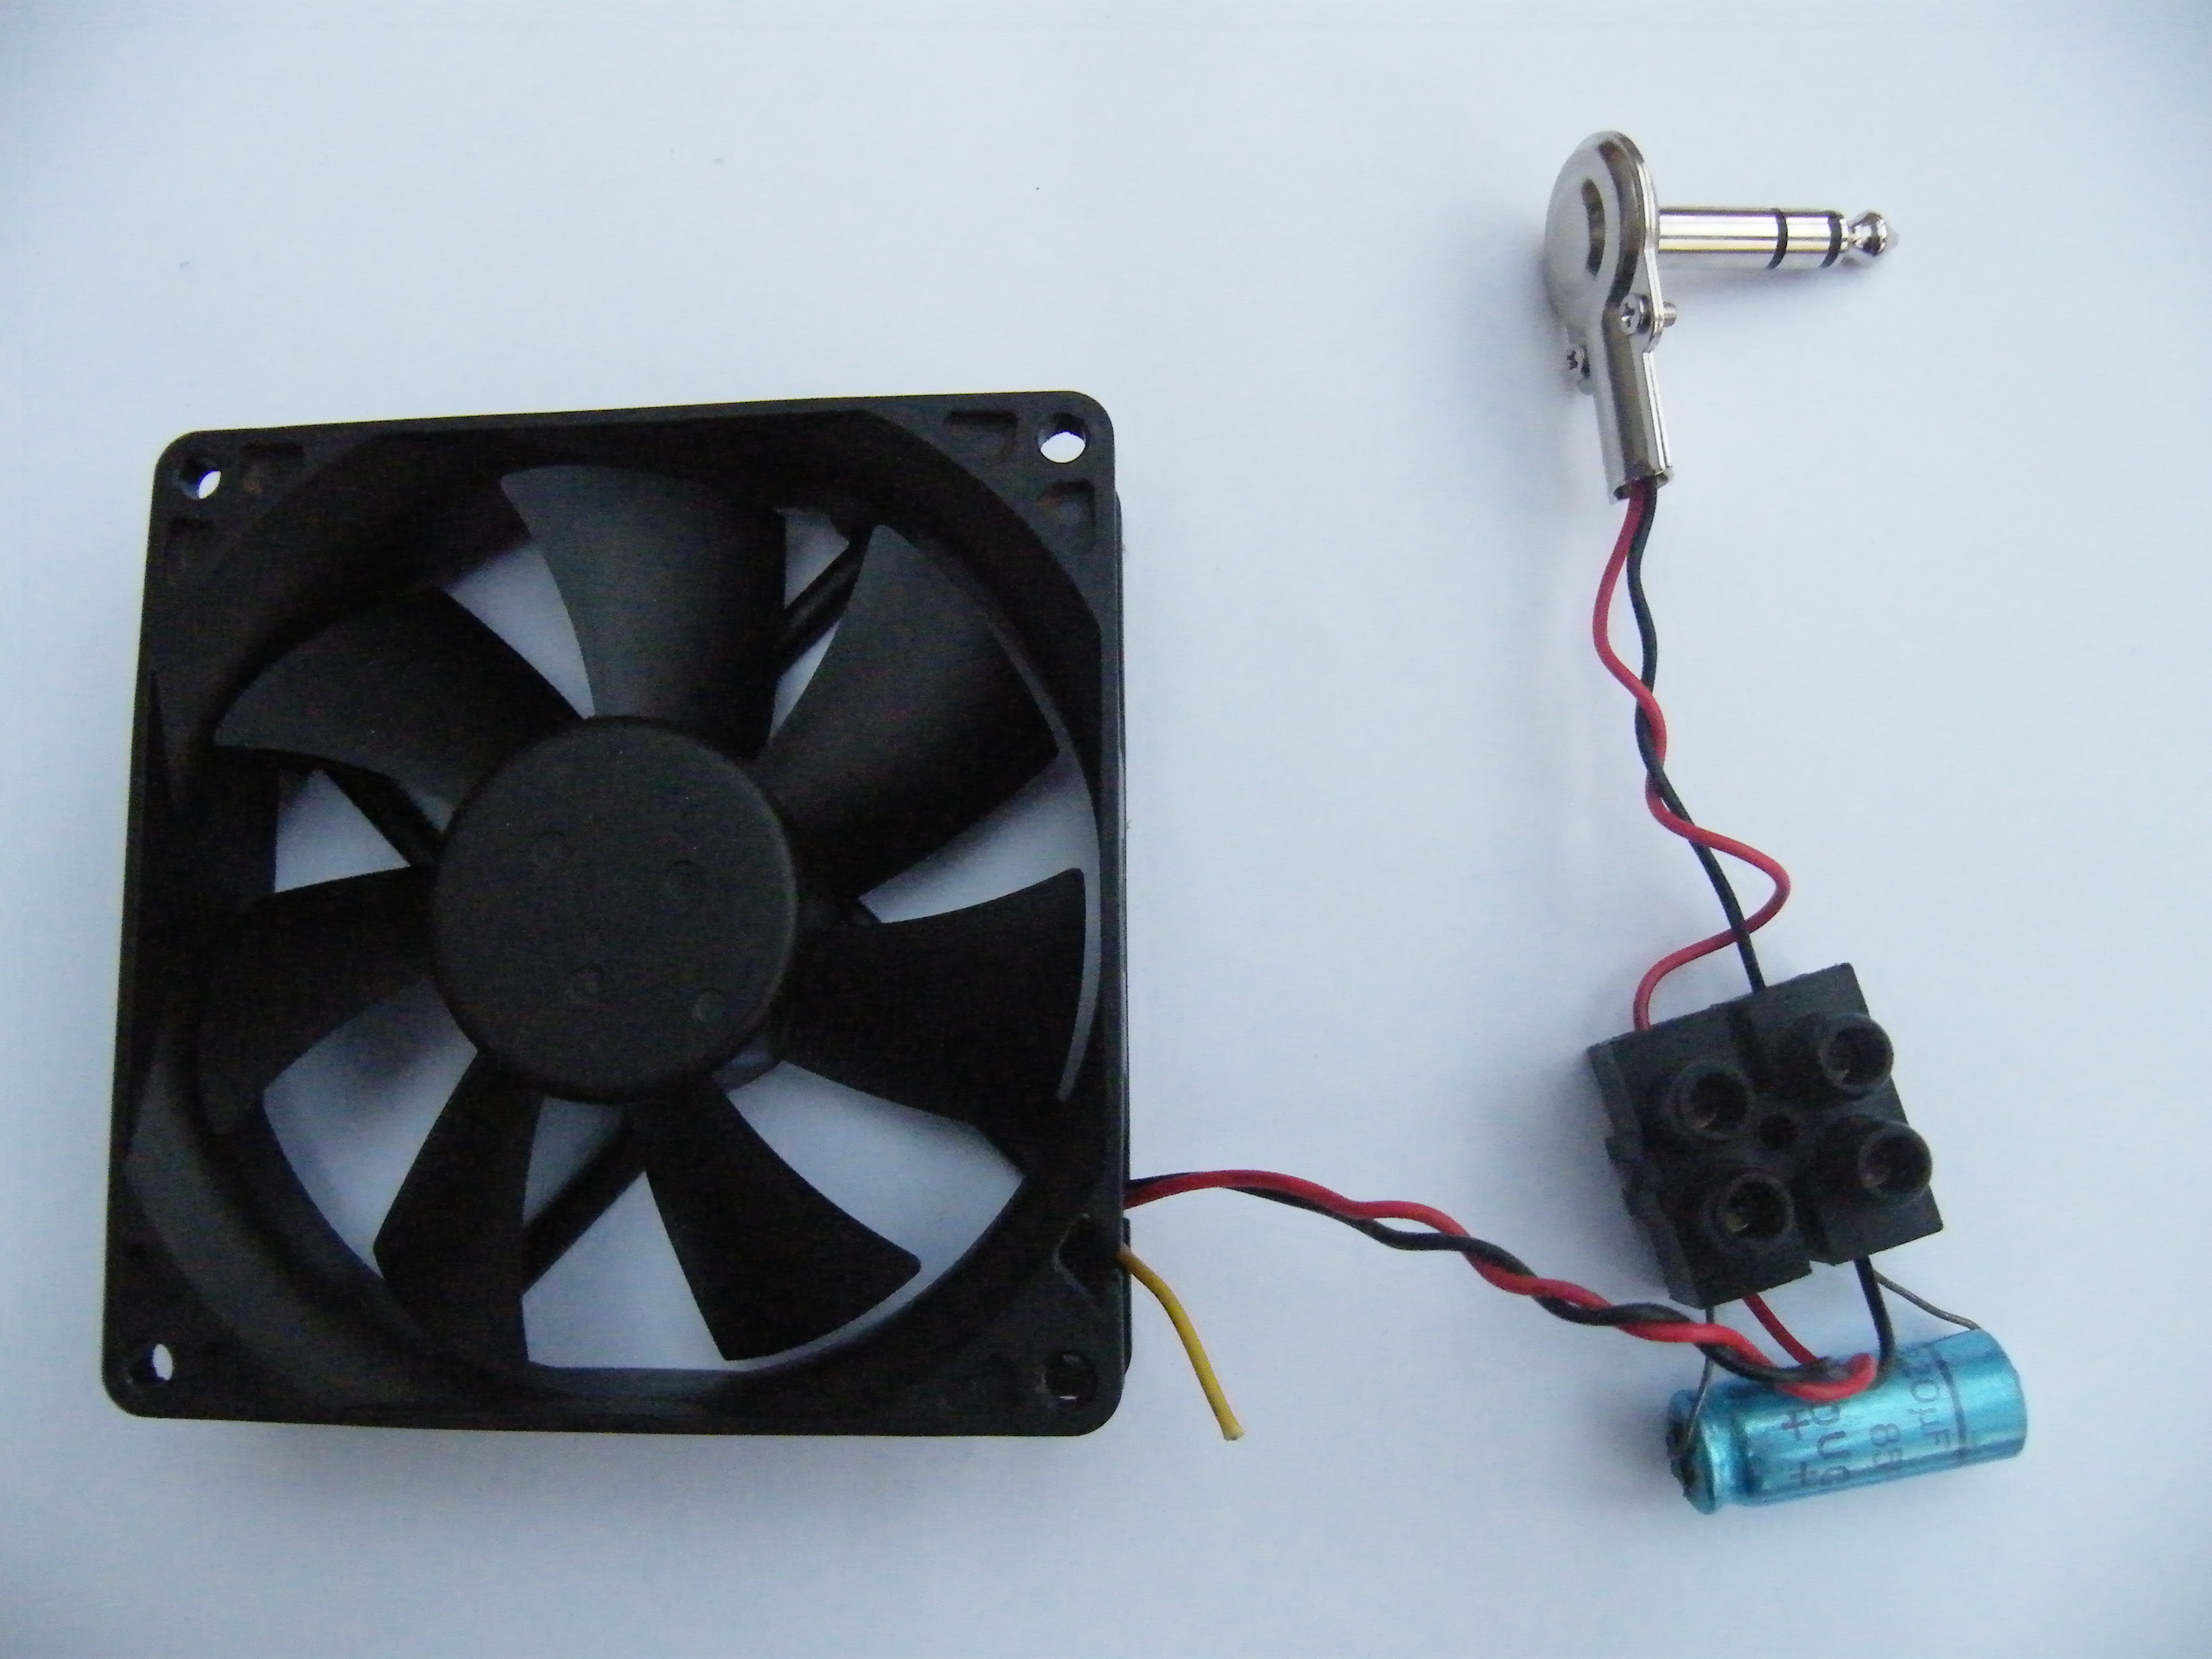
This (below) is what I
used to check the idea works. Yes, that's all there is to it.
This particular fan is actually too big to fit anywhere in the
amp. It draws about 60mA at 6V.
How and where you mount
the fan in the amp is up to you. In my opinion the best idea is
to move the air heated by the power valves out of airspace under
the chassis. However I couldn't see how to mount the fan in
order to do that - not enough room between the transformers and
the speaker- so I mounted my second, smaller fan (60mm) on
the inside of the rear panel so it blows cool air into
the amp, past the power valves.
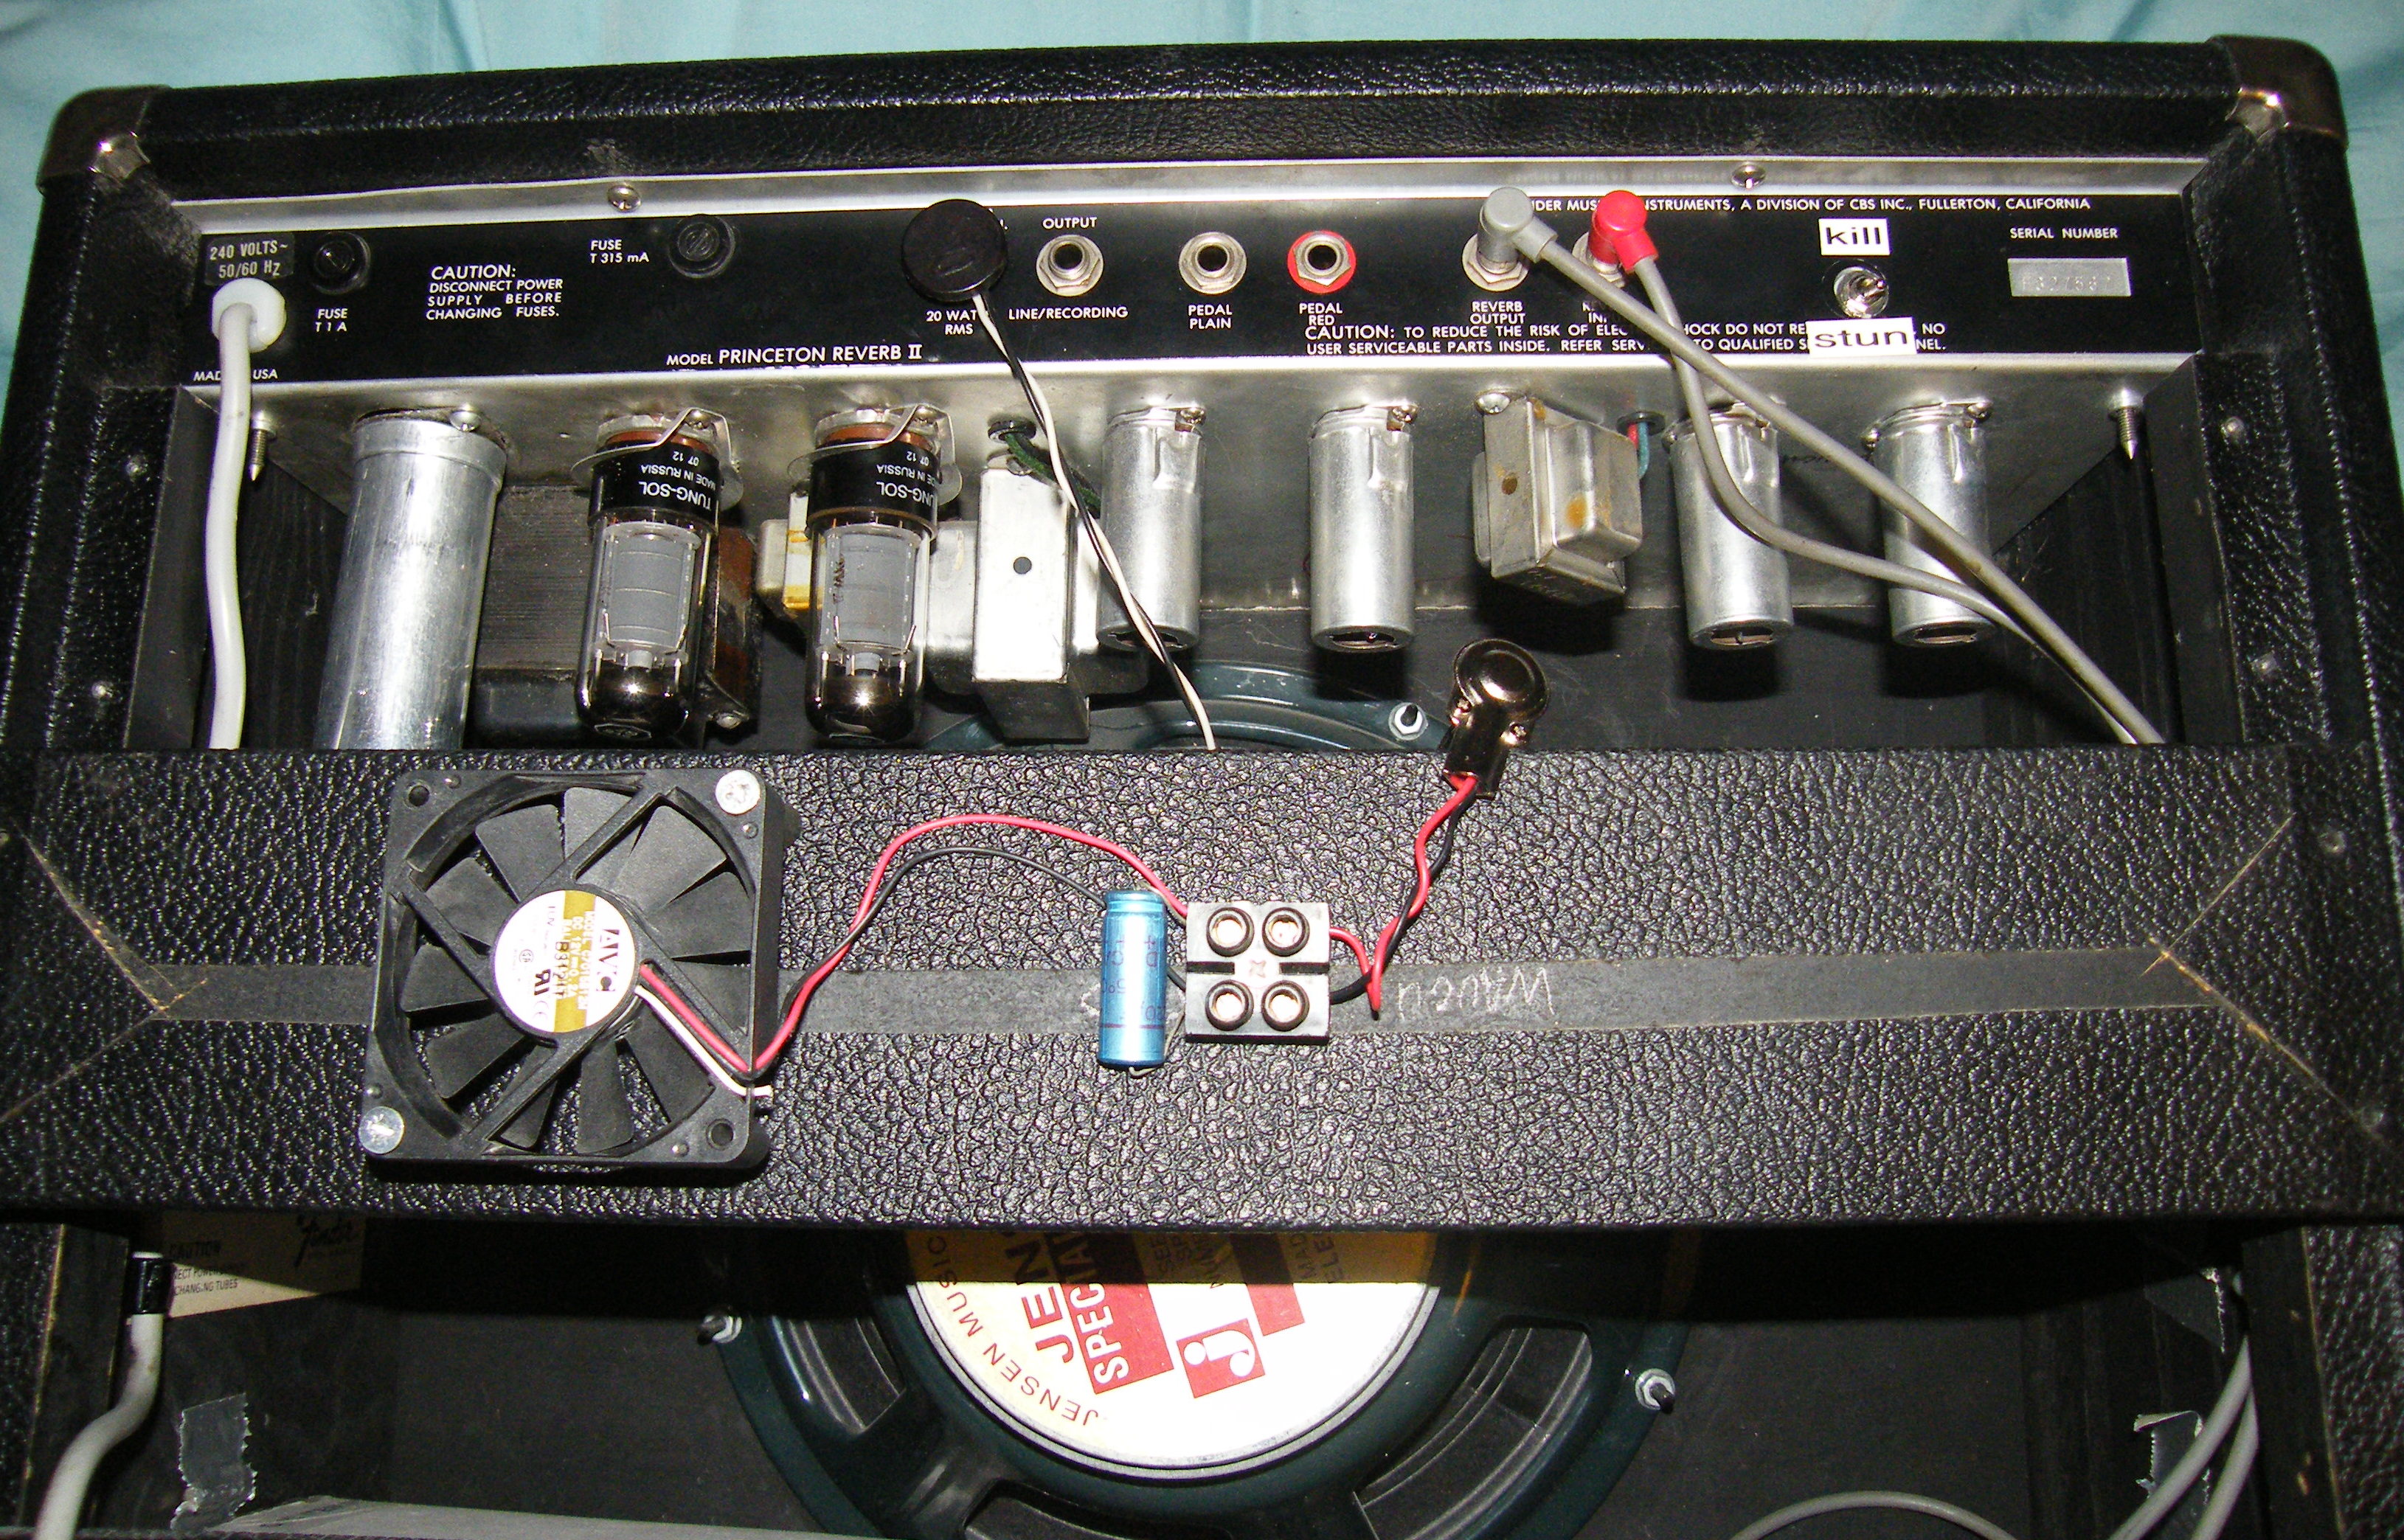
Here it is, mounted on
the inside of the upper rear panel, just before I turned the
panel over and screwed it back in position. Once in place the
fan makes a strong stream of air which can be felt all the way
past the 6V6s and the transformers.
In a
PRII there is a gap of 44mm between the rear panel and the 6V6
valves. To line up the fan with the gap between the 6V6s I had
to centre the fan 140 mm from the end of the panel.
These two dimensions are probably different for the other amp
models.
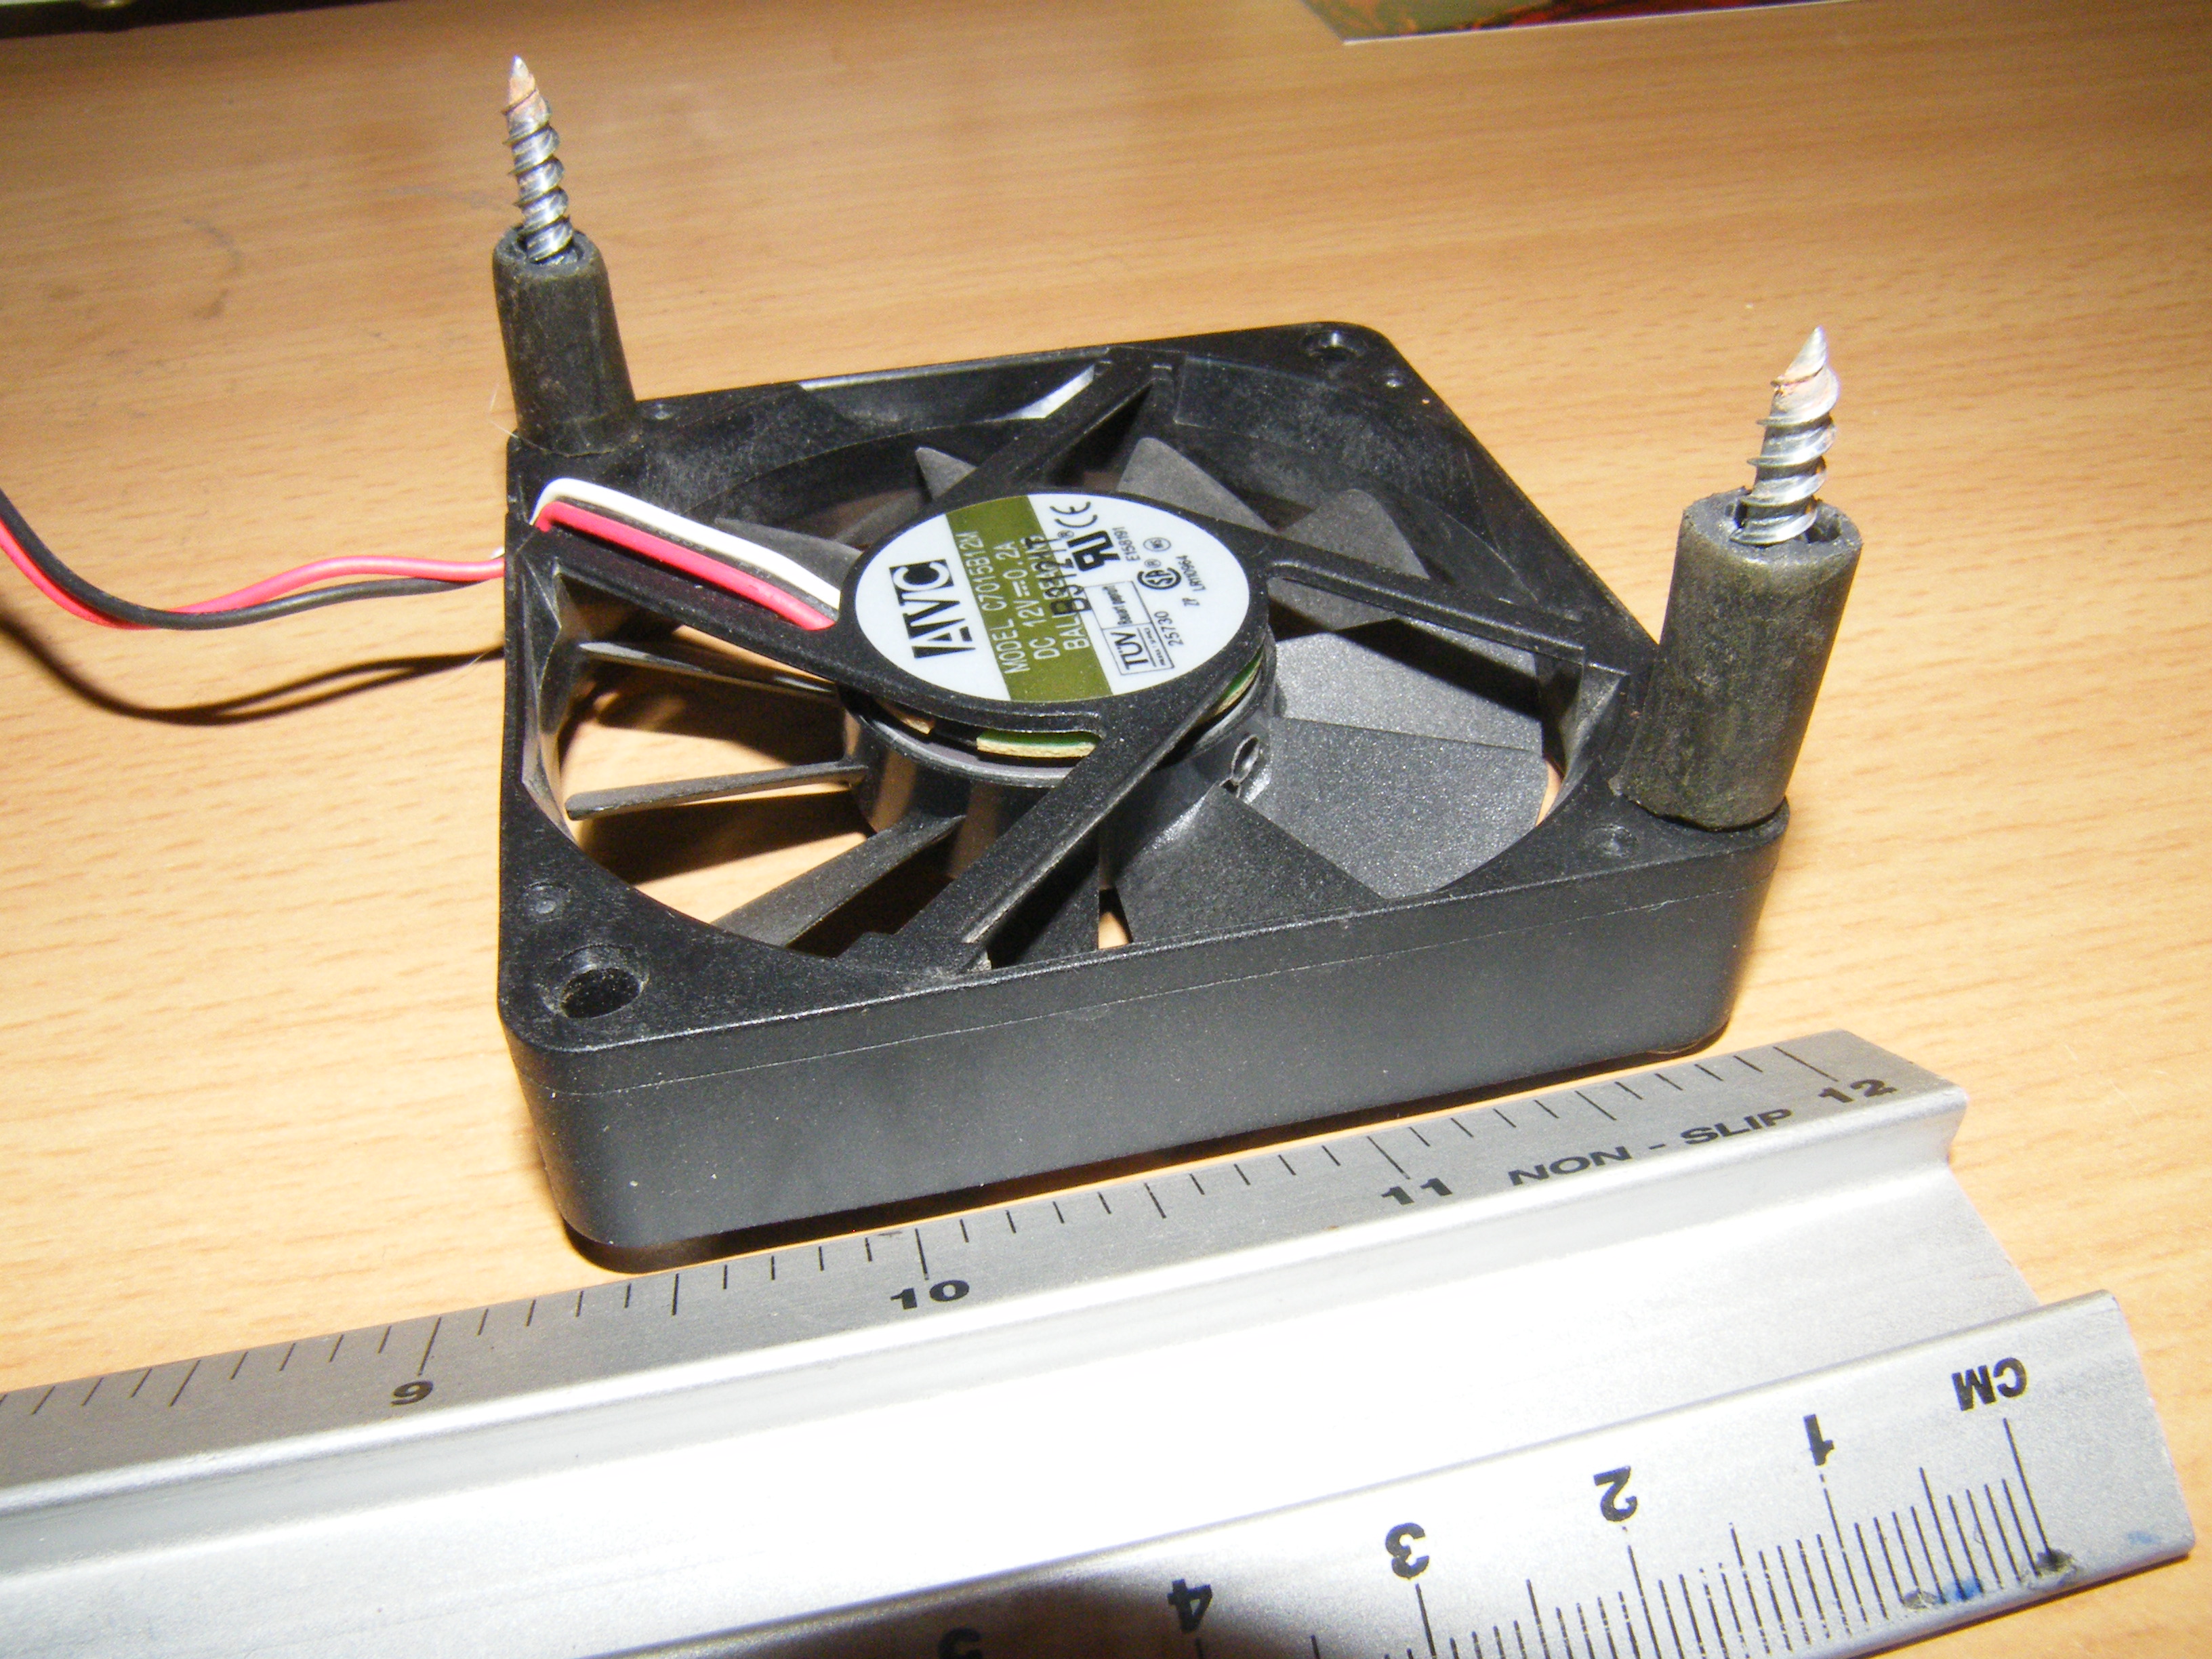
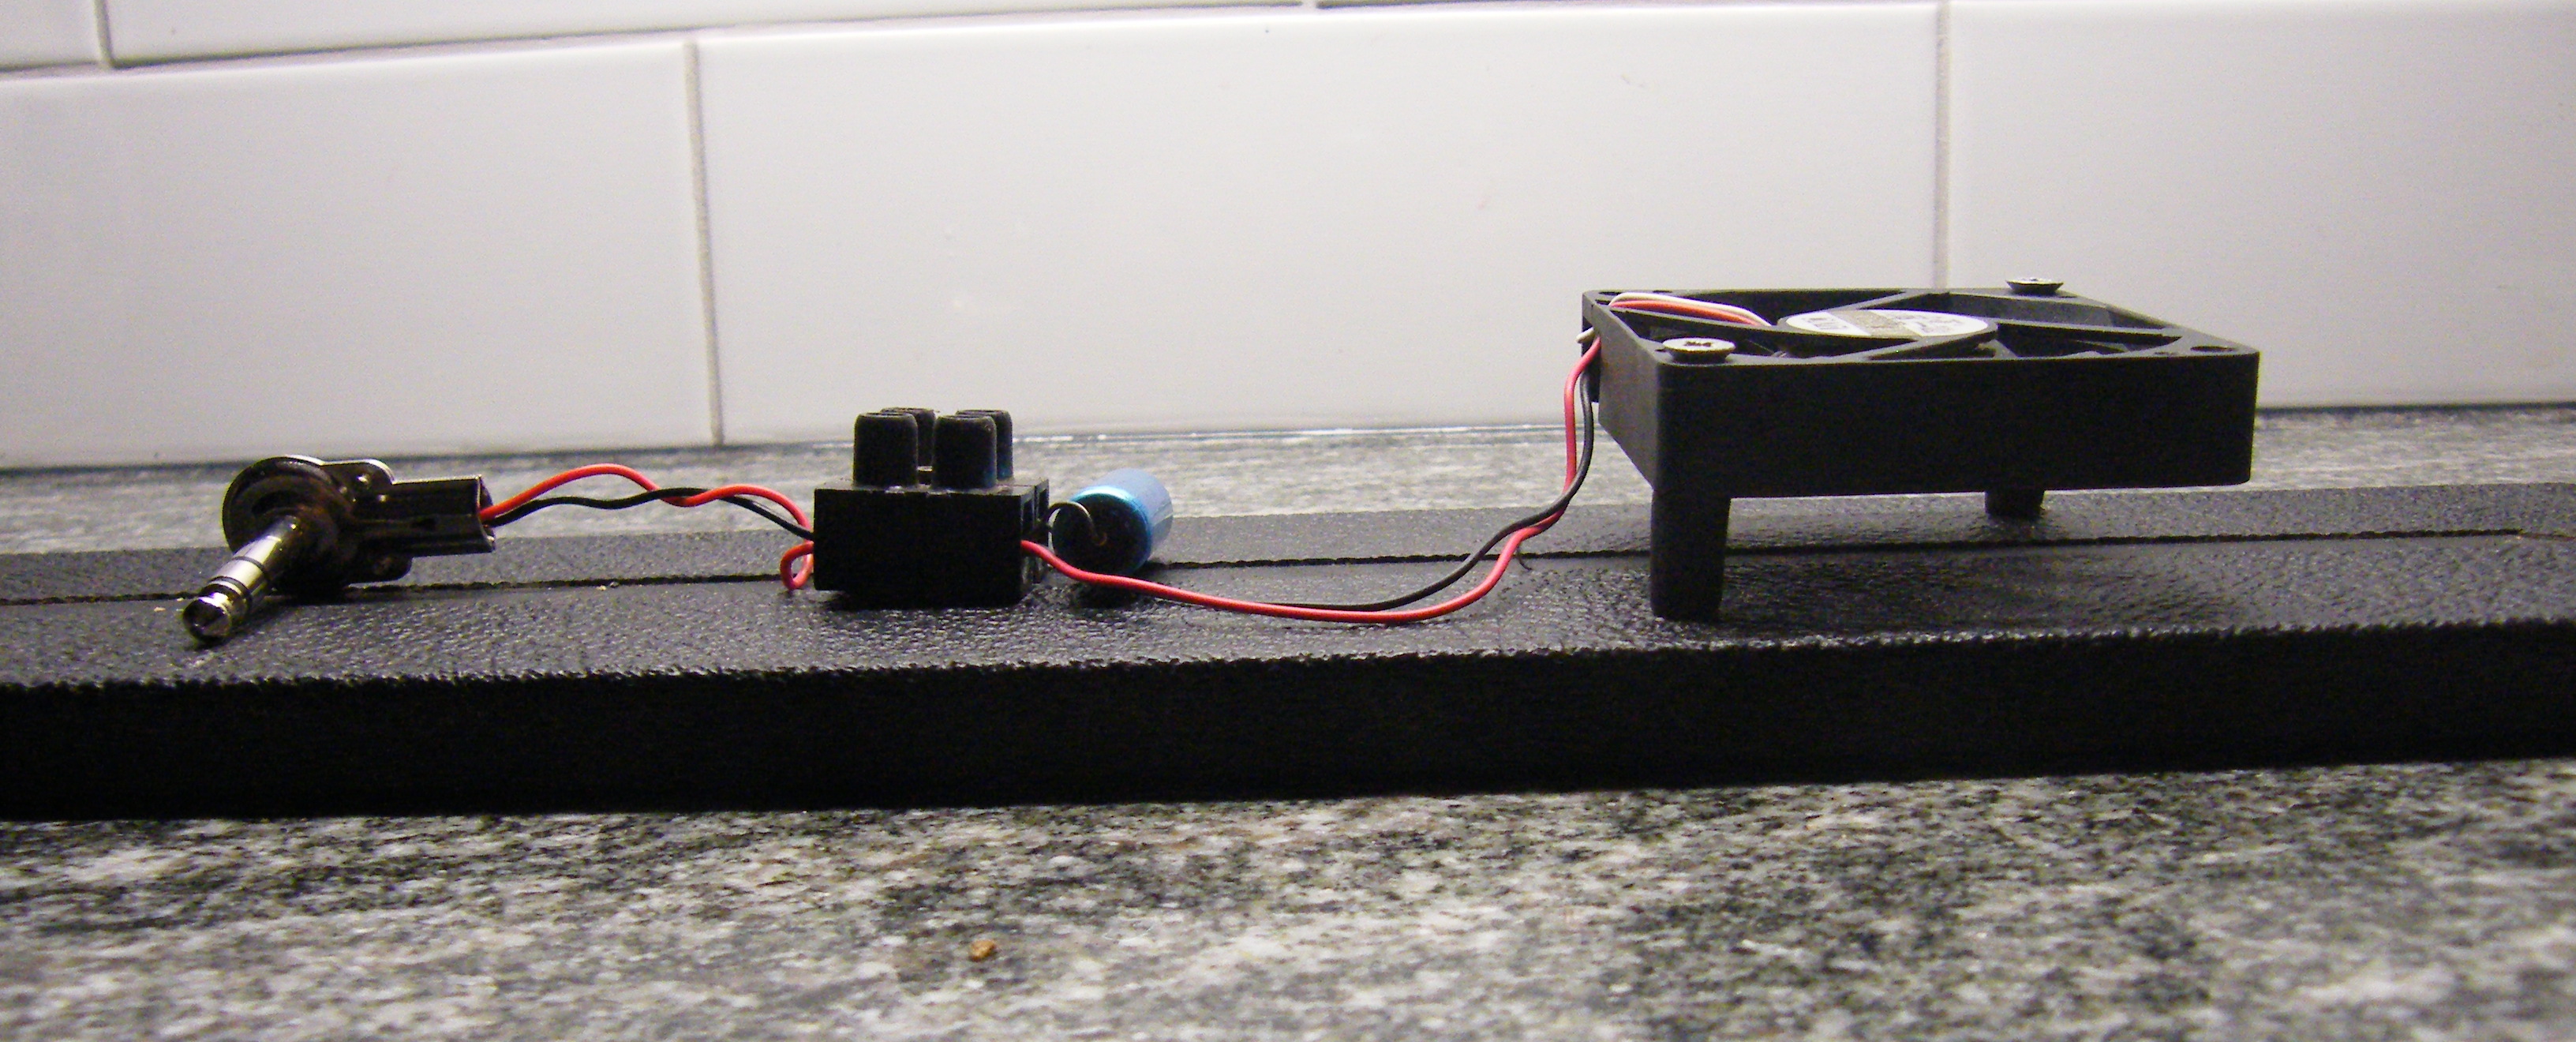
Here is
my mounting method - two woodscrews. Two 15mm lengths of the
outer covering of some mains flex act as spacers. The fan is
meant to blow towards the screw-heads.
Safety / Damage
Disclaimer
Valve
(tube) amps develop LETHAL VOLTAGES while running, and store
them in charged components EVEN WHILE SWITCHED OFF AND
DISCONNECTED FROM MAINS SUPPLY. These voltages are MUCH HIGHER
than mains, and higher than anything you'll find inside a
transistorized amp. If this scares you, good. Inside a chassis,
don't use your fingers to touch anything which isn't insulated
or earthed (grounded). Don't stick more than one hand in at a
time, and keep the other hand well away. Use fine-nose pliers to
manipulate components. Never, ever play a connected guitar while
near a live open chassis. If you're not sure what you're doing,
get local help. And don't stick your fingers in the fan.
I have to disclaim any responsibility for injury, damage, loss of value or loss of gig due to inoperative equipment. Most external web pages I've given as links all say roughly the same thing, and their content is of course not my responsibility.
back to top PRII
home
email me...
NOSPAMstratopastor@hotmail.com